Some links on this page are affiliate links. If you buy through them we may earn a small commission at no extra cost to you. This never influences our recommendations —
read our full approach.
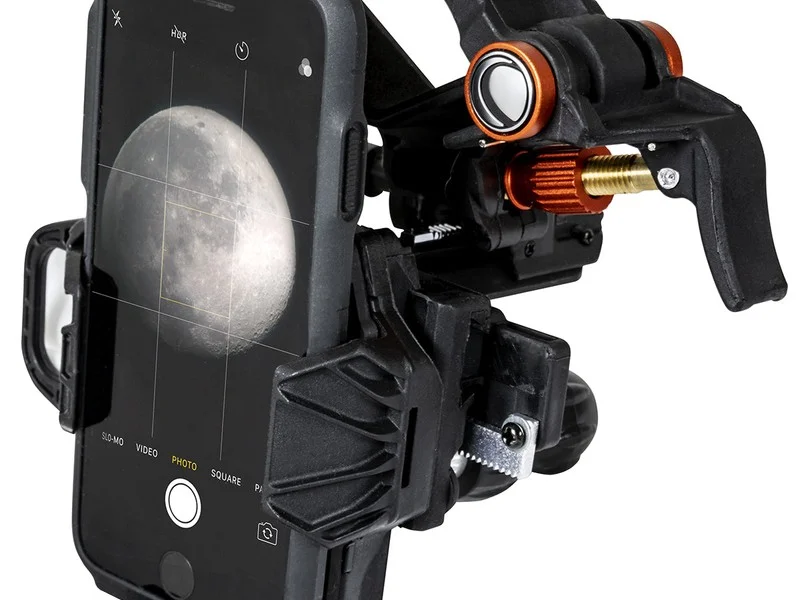
The Celestron NexYZ is the simplest way to photograph the Moon and planets: clip your phone to an eyepiece, adjust three alignment screws, press the wireless shutter button, and save images to your phone. No USB cables, no software, no learning curve. Works with any eyepiece you own and any smartphone made in the last decade.
The 3-axis adjustment means you can centre the phone's camera precisely over the eyepiece exit pupil — the critical step in phone-eyepiece astrophotography. Get this right and you capture sharp, detailed Moon craters and Jupiter's belts. Get it wrong and you get vignetting (dark edges). The NexYZ removes the trial-and-error.
The downsides are obvious: you're limited by your phone's sensor and lens. A modern smartphone has a fine sensor, but it's still optimised for general photography, not astronomy. Long exposures create hot pixels. Low-light performance is noisy. But at around £55, it's hard to complain.
Our verdict:
The gateway drug to astrophotography. If you own a telescope and a smartphone, this adapter removes every barrier to trying Moon and planet imaging. Start here.
Read full NexYZ guide →
Check price at FLO →
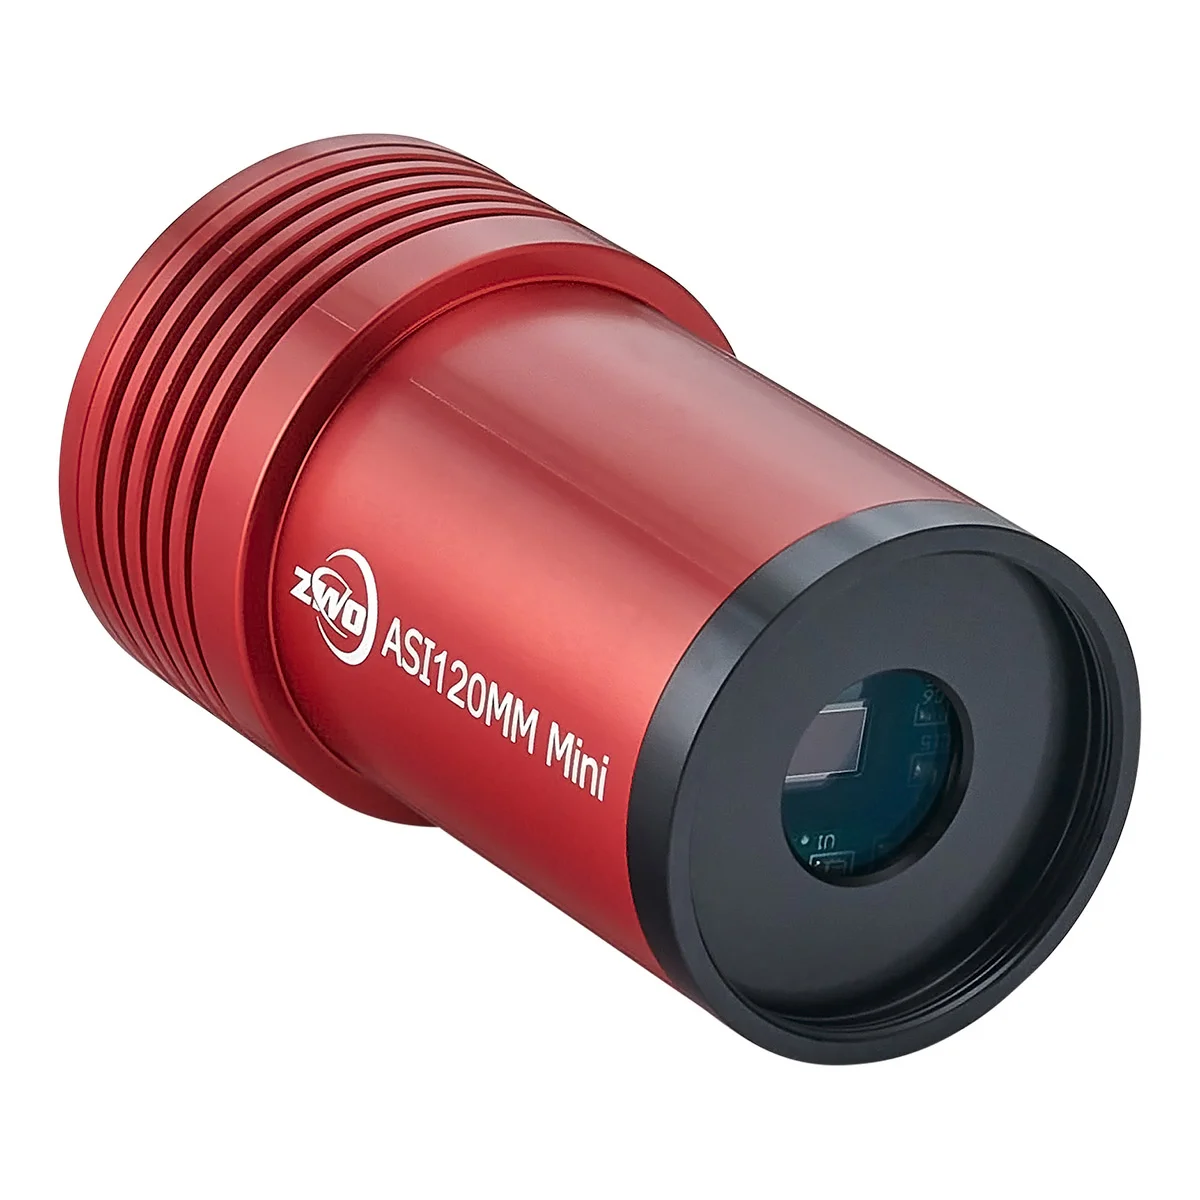
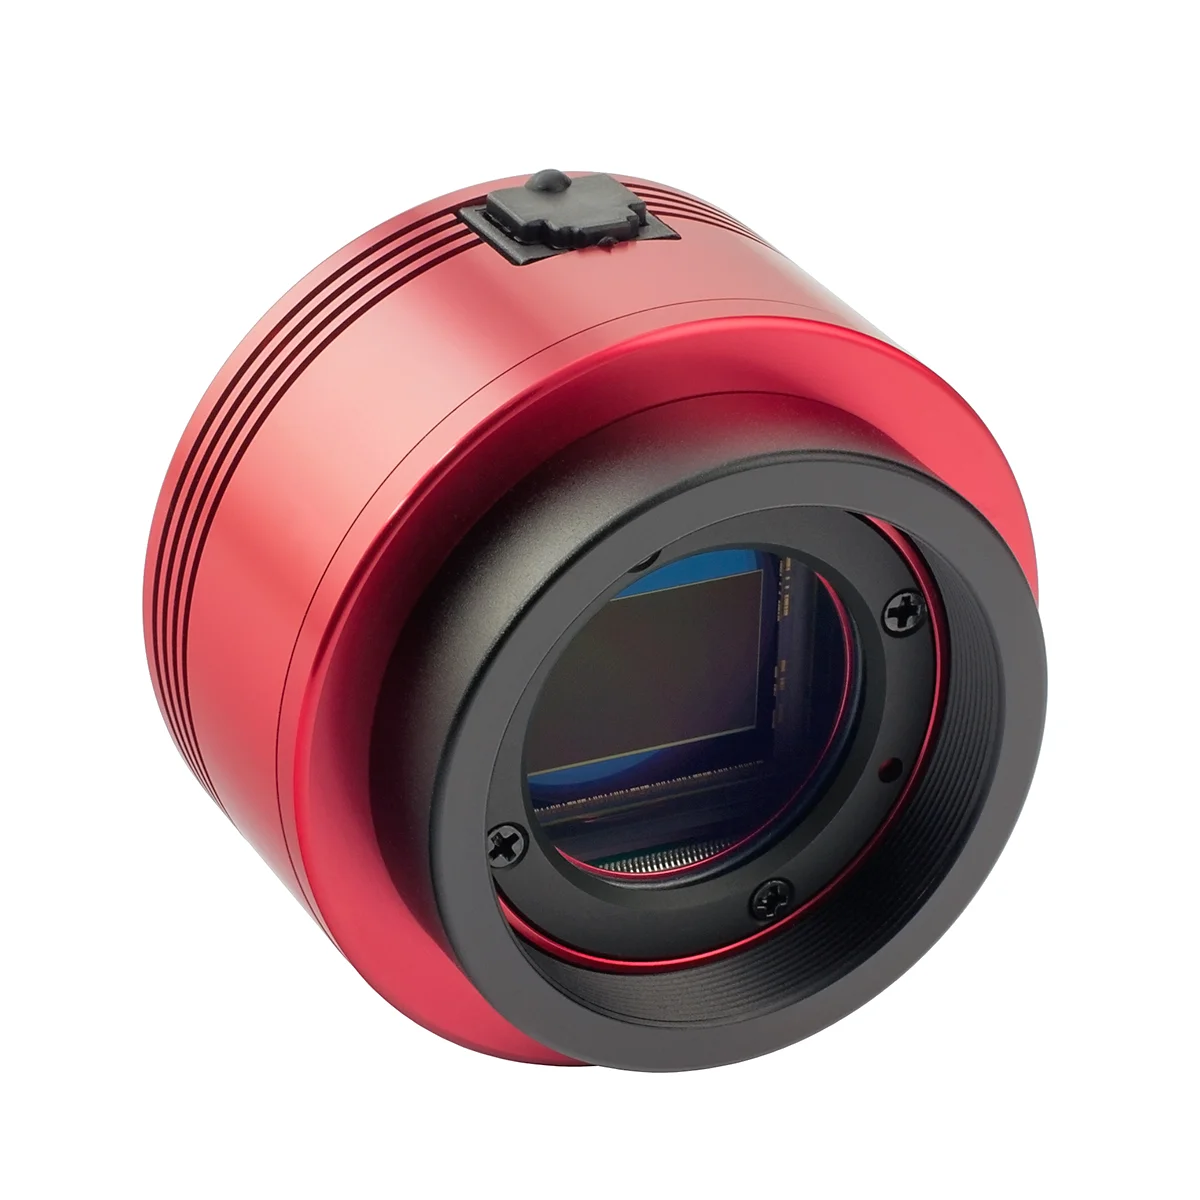
The ZWO ASI 120MM Mini is a mono sensor that produces sharper planetary images than colour cameras at the same price. Why? Mono sensors don't waste light on colour filters — every photon captured becomes brightness information. The result: crisp detail on Jupiter's belts and Saturn's rings that colour cameras struggle to match.
USB 2.0 limits you to 60–75 fps, but this is a feature for planetary imaging. Slower frame rates mean larger individual files, which preserve fine detail better than tiny USB 3.0 packets. You're deliberately trading speed for image quality. Coupled with lucky imaging (stacking software), you'll produce planetary images that rival much more expensive setups.
The 120MM Mini also doubles as an autoguider — it's compact enough to fit on a guide ring, and mono sensors are excellent for finding guide stars. So you're buying two functions in one. At around £153, this is ZWO's entry-level mono camera, and it's genuinely excellent value for serious planetary imagers.
Our verdict:
The best mono option for beginners. Sharper than colour cameras, versatile as both a planetary imager and autoguider, and backed by ZWO's excellent community support. Start here if planetary detail is your goal.
Read full ASI 120MM Mini guide →
Check price at FLO →
The ZWO ASI 662MC is the happy middle ground between planetary and deep-sky imaging. Its Sony IMX662 sensor is backside-illuminated (BSI) — the light-gathering side faces the incoming light rather than the wiring, making it much more sensitive. At 130 fps over USB 3.0, you capture 2000 frames of Jupiter in 15 seconds, giving excellent material for lucky imaging stacking.
The colour advantage means you can see Jupiter's cloud bands in real-time without processing, which beginners find encouraging. The downside is that colour filters reduce sharpness slightly compared to mono sensors of the same resolution. But for most beginners, the visual feedback is worth the trade-off. You'll produce colour planetary images that look professional.
At around £199, the ASI 662MC bridges the gap between entry mono cameras and expensive cooled deep-sky rigs. It's excellent if you're torn between planetary and wide-field imaging — you can use it for both. The USB 3.0 speed also means it doubles as an autoguider without complaint.
Our verdict:
The versatile all-rounder. If you want colour planetary images with excellent speed and the flexibility to try deep-sky work, this is your camera. A genuine stepping stone between beginner and intermediate imaging.
Read full ASI 662MC guide →
Check price at FLO →
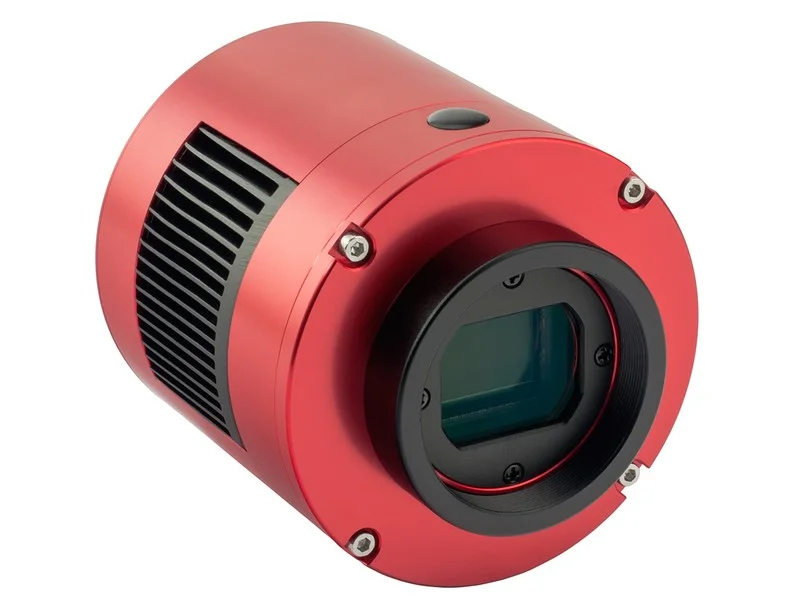
The ZWO ASI 294MC is the uncooled version of the popular deep-sky camera. Why uncooled? Because in the UK, you're never doing 30-minute exposures — our skies don't clear long enough. Instead, you'll stack 1–2 minute exposures. At 1–2 minutes, thermal noise is negligible, so cooling buys you nothing. You save £285 and get the same results.
The real advantage is the lack of an IR-cut filter. Most cameras filter out infrared light (which Canon DSLRs do), but the ASI 294MC lets it through. This means it's incredibly sensitive to hydrogen-alpha light — the deep red emission from nebulae like the Orion Nebula and Pillars of Creation. You'll see nebulosity in these targets that surprised imagers expect to miss.
The large 4/3" sensor gives an excellent field of view. At 4.63µm pixel size, it's forgiving of seeing conditions and optical imperfections. Pair it with a proper equatorial mount and stacking software (Siril, PixInsight), and you'll capture images of faint galaxies and glowing nebulae that rival observatory equipment. This is where hobby astrophotography becomes serious.
Our verdict:
The best value deep-sky camera for UK observers. No thermal noise issues at our typical 1–2 minute exposures, excellent H-alpha sensitivity, and £280 cheaper than the cooled Pro version. Step up from colour cameras when you're ready for proper deep-sky work.
Read full ASI 294MC guide →
Check price at FLO →
The ZWO ASI294MC Pro is the camera that serious hobbyist astrophotographers use for deep-sky imaging. The thermoelectric (TEC) cooler drops the sensor to −40°C (or more) below ambient temperature, which dramatically reduces thermal noise (the grainy mess that appears in long exposures). Cooled astrophotography is the step into "proper" deep-sky work.
The large 4/3" sensor captures an impressive field of view through a typical scope. The 9.3MP resolution is lower than a DSLR, but that's by design — bigger pixels are more forgiving of atmospheric seeing and optical imperfections. Long 15–30 minute exposures at high gain produce clean, detailed images of distant galaxies and nebulae.
But this camera requires infrastructure: a proper equatorial mount with accurate tracking (to avoid star trails in 30-minute exposures), a dedicated observatory-grade 12V power supply, and experience with image stacking software (Siril, PixInsight, Astro Pixel Processor). It's not a casual buy.
Our verdict:
The step up from DSLR astrophotography. If you've done Milky Way and nebula shots with the EOS 2000D and want sharper results with less work, this is the upgrade. But only if you're committed to the hobby.
Read full ASI294MC Pro guide →
Check price at FLO →
The Astrophotography Ladder
Start with your phone
Seriously. A smartphone on a £40 adapter to your eyepiece teaches you the fundamentals — alignment, exposure time, focus — with zero financial risk. You'll produce Moon and Jupiter photos that surprise you.
Graduate to a USB planetary camera
Once you understand stacking and want sharper planetary images, jump to the ZWO ASI 120MM Mini (mono, for maximum sharpness) or ASI 662MC (colour, for convenience and speed). You'll spend hours processing, but the reward is images that rival professional observatories. This is where many astrophotographers stay for years — there's nothing wrong with specialising in planetary imaging.
Deep-sky with an uncooled camera
The ZWO ASI 294MC opens deep-sky nebulae and galaxies to you. The large 4/3" sensor captures a wide field, and the lack of an IR-cut filter makes it incredibly sensitive to hydrogen-alpha emissions (red nebulae). At 1–2 minute exposures, uncooled is practical for UK skies. This is totally different work from planetary imaging — different software, different targets, different workflow.
The cooled camera: maximum sensitivity
The ZWO ASI294MC Pro (cooled version) is where you go if you want to push faint galaxies and nebulae to their limits. Cooled sensors eliminate thermal noise and let you expose for 30 minutes at a time. Faint galaxies become visible. The Whirlpool Galaxy shows spiral structure. But you'll need a serious equatorial mount, dedicated power supply, and expertise in image processing software.
Lucky imaging explained
The technique that makes planetary cameras work. You record video (2000 frames) of Jupiter or the Moon, then software picks the best 200 frames and stacks them into one sharp image. This works because brief moments of good atmospheric seeing produce sharp frames — the software finds them.
Software you'll need (all free)
Planetary imaging: SharpCap (capture), AutoStakkert (stacking), Registax (final processing) — all free and community-standard.
Deep-sky imaging: Siril (stacking) or Astro Pixel Processor (paid, £60), plus free planetarium software (Stellarium) for planning.
General: Pixinsight (£35 one-time, industry standard) for advanced processing.
Do you need a tracking mount?
Phone adapter: No — just point and shoot.
Planetary USB camera: No — you're recording video anyway.
DSLR (wide-field Milky Way): No — wide fields are forgiving, 30 seconds is enough.
DSLR (nebulae & galaxies): Yes — you need 2–5 minute exposures to gather light, which requires a tracker to avoid star trails.
Cooled deep-sky camera: Yes — mandatory. Dedicated mounts like the Star Adventurer or Skywatcher AZ-EQ5 or equatorial telescope mounts.