Hydrogen-Alpha Solar Photography
Prominences, filaments and flares from a back garden, in daylight, with a telescope that fits in a rucksack
Hydrogen-alpha solar photography is the branch of astrophotography you can do at eleven in the morning with a cup of tea. A small dedicated solar telescope, a planetary camera and a tracking mount are all it takes to photograph prominences arching off the Sun's edge, dark filaments snaking across its face and the bright scars of active regions, all of it invisible through an ordinary solar filter. The orange images you see shared by UK astronomy groups every sunny week were mostly taken with exactly this kit, from gardens no darker than yours.
This guide covers what hydrogen-alpha actually shows you, the three pieces of equipment you need and what they cost, how to set up and tune the telescope, the capture settings that work, and the free software that turns a shaky video into a sharp picture. If you have never observed the Sun through any telescope before, read our guide to observing the Sun safely first. Everything below assumes you have.
What Is Hydrogen-Alpha Solar Photography?
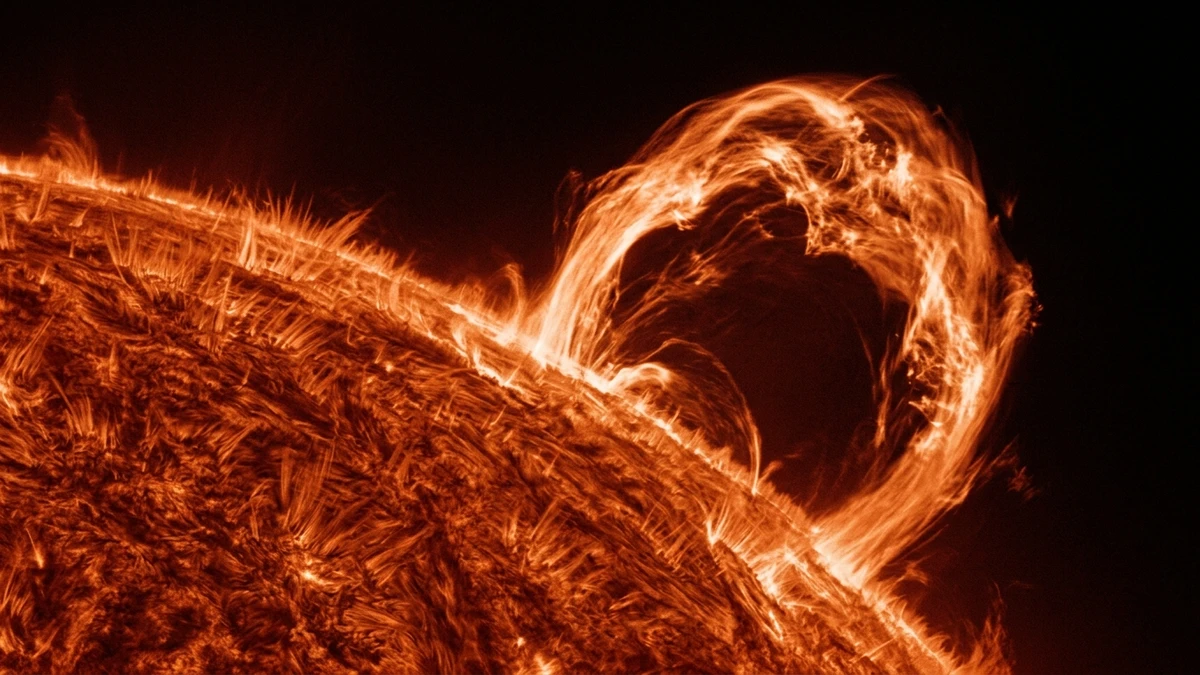
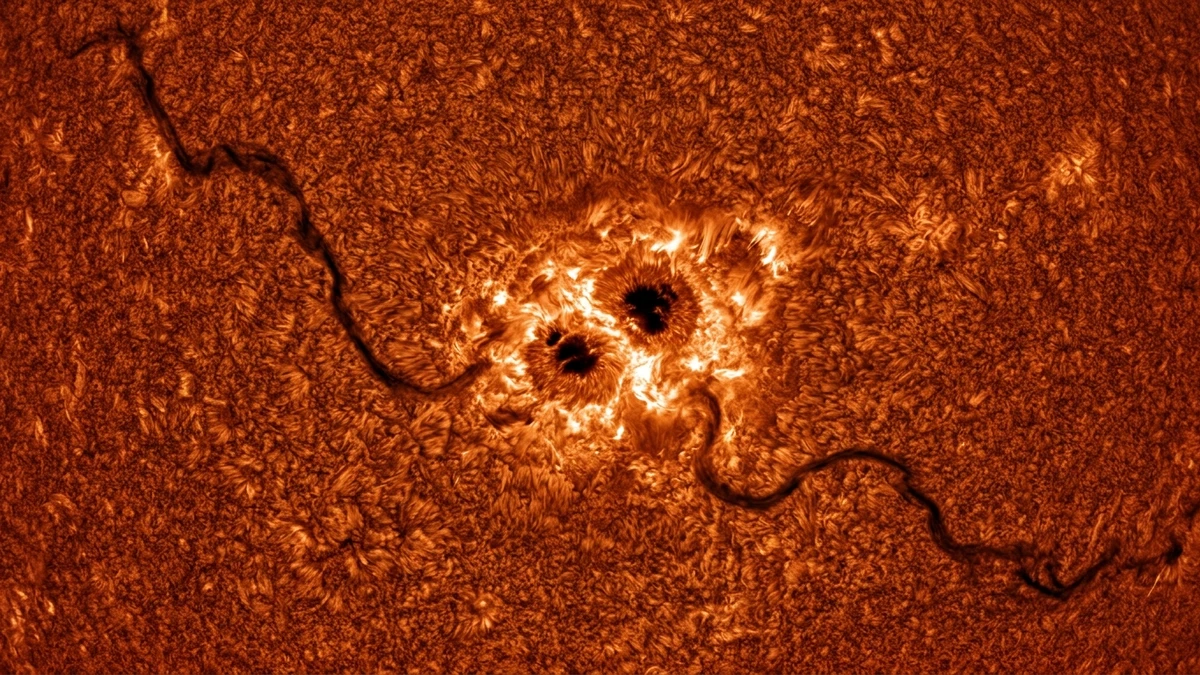
Hydrogen-alpha (H-alpha) solar photography is imaging the Sun through a filter so narrow it passes only one colour: the deep red light hydrogen atoms give off at 656.28 nanometres. Block everything else and the blinding white surface fades away, and what is left is the chromosphere, the thin, restless layer of gas sitting just above it.
That is where all the action is. In H-alpha you can see:
- Prominences: loops and curtains of plasma standing off the Sun's edge, often bigger than Earth many times over, and changing shape hour by hour.
- Filaments: the same prominences seen against the disc, where they show up as long dark threads.
- Plage: bright patches of hot gas around active regions, with sunspots sometimes visible inside them.
- Flares: sudden brightenings that can appear and fade within the length of a cup of tea. Catching one is a real thrill.
- Spicules: the fine grass-like fringe along the limb, and the fibrous texture over the whole disc.
None of this is visible through the white-light filter or eclipse glasses that show you sunspots. The two are different layers of the Sun, and H-alpha is the one that moves. The image comes off the camera in monochrome, and the orange or red is added afterwards, partly by convention and partly because it looks right. Our post on the sharpest image of the Sun ever taken shows what the same layer looks like through a four-metre professional telescope; a 40mm one from a back garden shows the same features, just smaller.
What Equipment Do You Need for H-Alpha Solar Imaging?
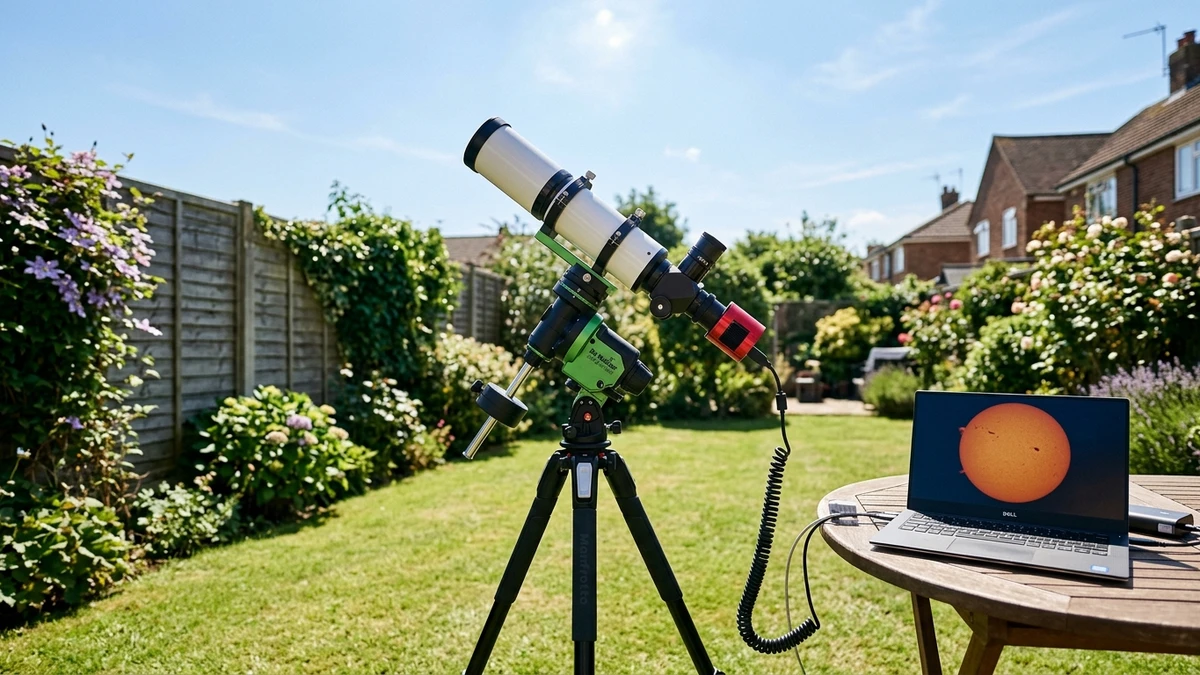
Three things: a dedicated hydrogen-alpha telescope, a small fast camera, and a mount that tracks. Bought new from First Light Optics, the setup below comes to about £1763, and it is the same combination behind a large share of the H-alpha images posted to UK astronomy groups.
The telescope: a dedicated H-alpha scope
The filter is the expensive part, not the glass. An H-alpha scope contains an etalon, a pair of precisely spaced reflective plates that pass only a band less than 0.7 ångströms wide, plus a blocking filter in the diagonal that removes everything else. The Lunt LS40THa (£1,029 at FLO) is a 40mm f/10 refractor with all of that built in and a tilt ring on the front to tune it. It is the modern successor to the Coronado PST, which was the classic way in for twenty years and still turns up second-hand for £400 to £500. The B500 blocking filter is the right one for a 400mm focal length and a small camera sensor; you only need the B600 or B1200 versions if you plan to use a bigger sensor or a longer scope later.
Forty millimetres sounds tiny, and it is. But the Sun is bright enough that aperture matters far less than it does at night, and the seeing in daytime air rarely supports more than 60 to 80mm anyway. A 40mm scope gives a full-disc image with the whole ring of prominences in one frame, which is what most people want first.
The camera: a small, fast planetary camera
Solar imaging uses the same lucky-imaging method as planets: record thousands of frames of video and keep only the sharpest. So you want a camera built for that, not a DSLR. The ZWO ASI678MC (£299) has become the popular choice: 2-micron pixels, so the 3.7mm solar image at 400mm focal length fills the frame with room to spare, and USB3 for the frame rates that freeze the seeing. It is a colour camera, which for H-alpha means only the red pixels see anything. That costs some resolution against the mono ASI678MM, but colour cameras are cheaper and much less prone to the Newton's rings that trouble mono sensors in narrowband light. Plenty of very good images come off the MC. If you already own a planetary camera from imaging Jupiter and Saturn, use that.
The mount: anything that tracks
You can do H-alpha on a manual alt-azimuth mount by nudging the Sun back into frame every minute, and plenty of PST owners have. But a two-minute video with the Sun drifting through it is a pain to stack, and you will want both hands for the tuning ring and focuser. A tracking mount fixes all of that. The Star Adventurer GTi (£435) is the sweet spot: it carries a 40mm solar scope and camera easily, sits on a photo tripod, and its SynScan app includes a solar alignment routine, so you can set it up in daylight without ever seeing a star. Our guide to telescope mounts and star trackers covers the alternatives if you already own one.
Beyond those three: a laptop, a USB3 cable, and something to shade the screen. A cardboard box with one side cut out is the traditional solution and nobody has improved on it.
The hydrogen-alpha starter kit
Kit we've reviewed in full
This is the setup behind most of the amateur H-alpha images you see on UK astronomy groups: a dedicated 40mm solar scope, a small planetary camera and a tracking mount that fits on a photo tripod.
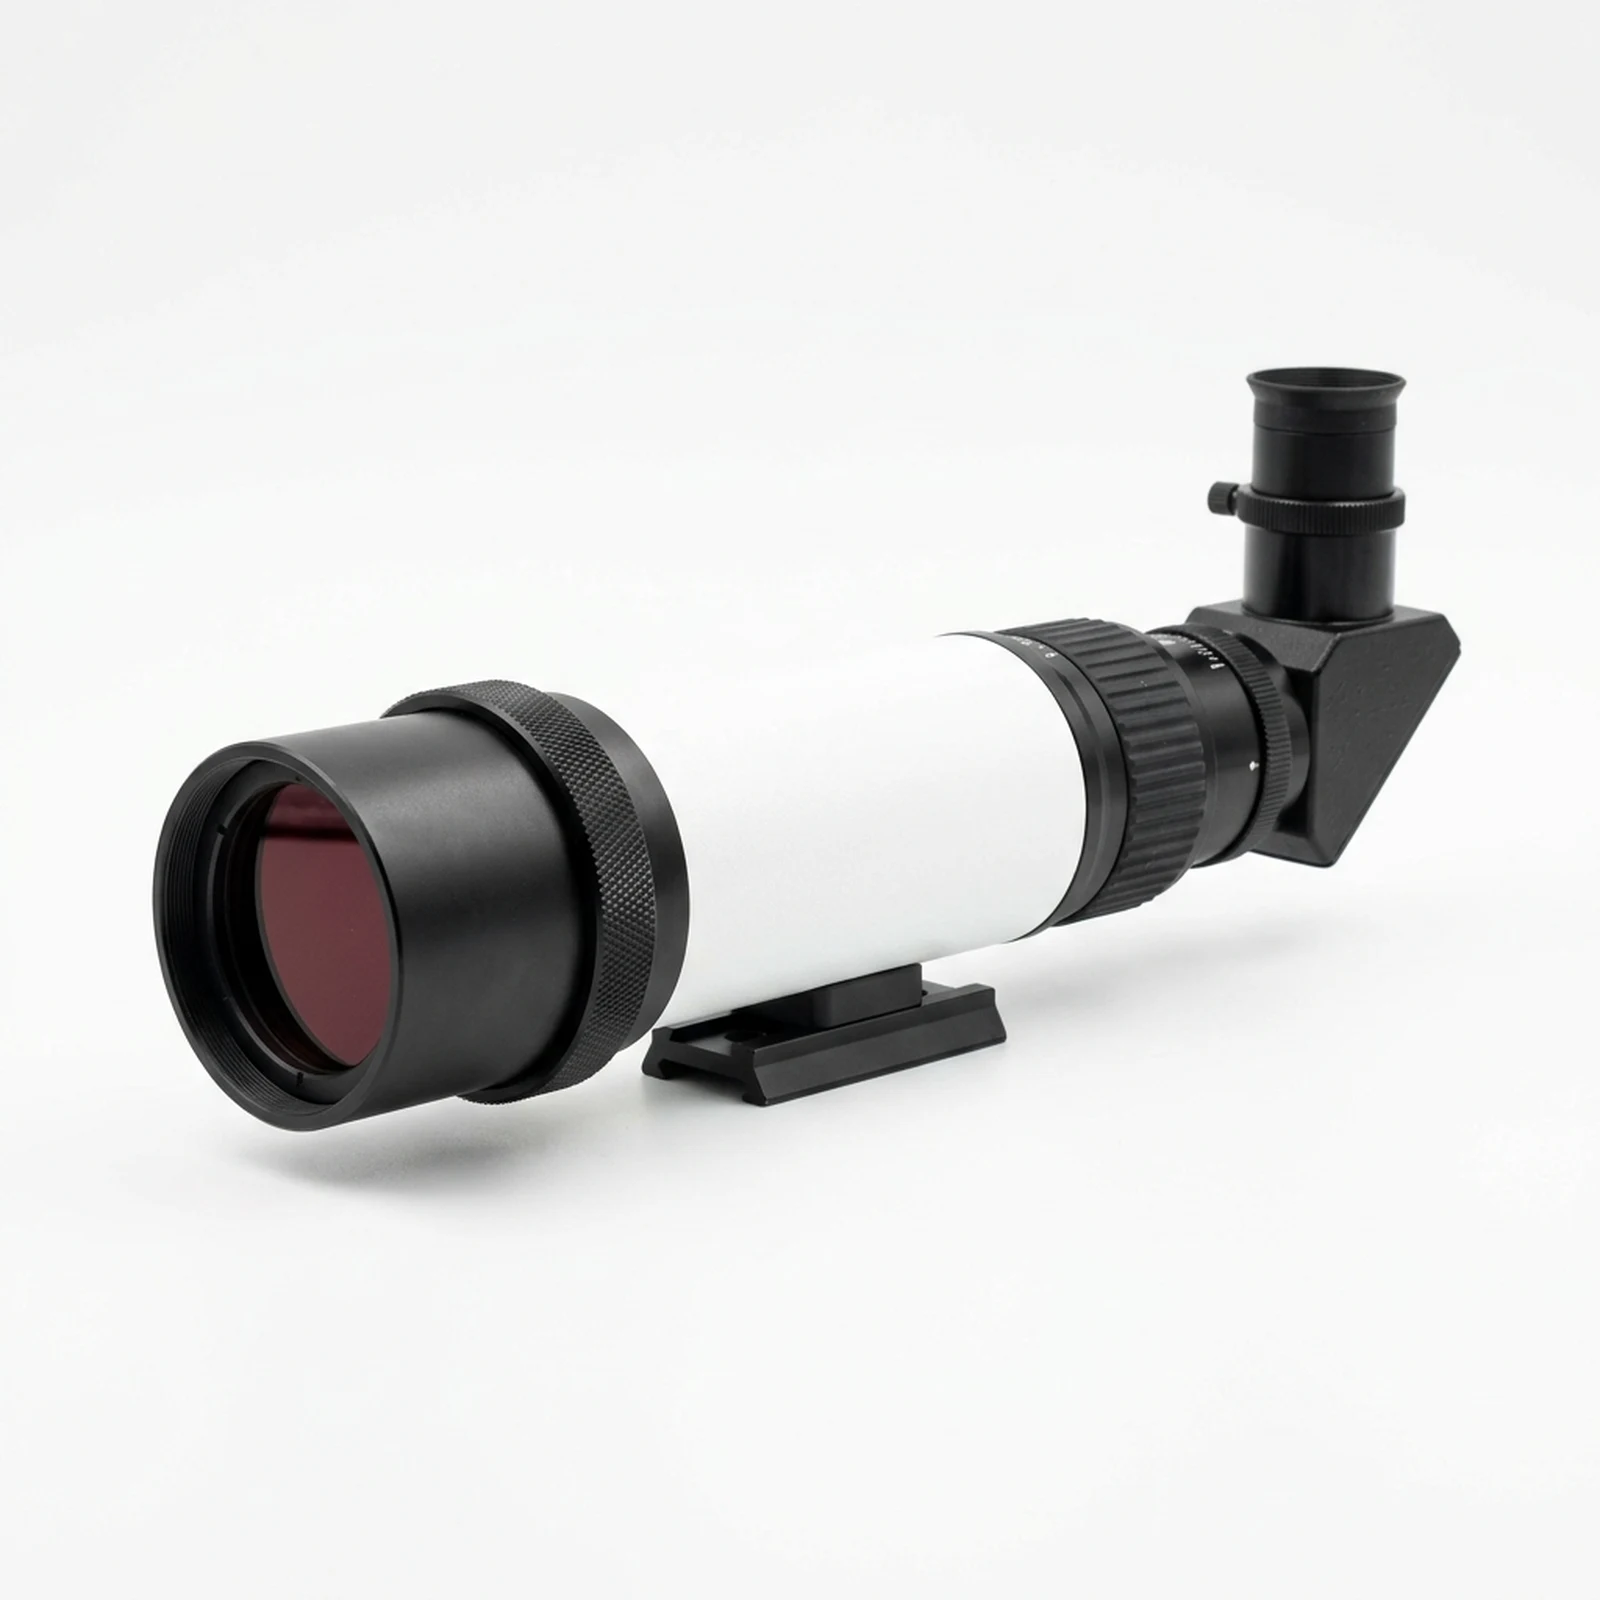
Lunt LS40THa/B500 H-alpha Solar Telescope
A complete 40mm f/10 hydrogen-alpha scope with the etalon and blocking filter built in, so it is safe to use straight out of the box. Tilt-tune the front ring and the prominences appear. The standard UK entry point.
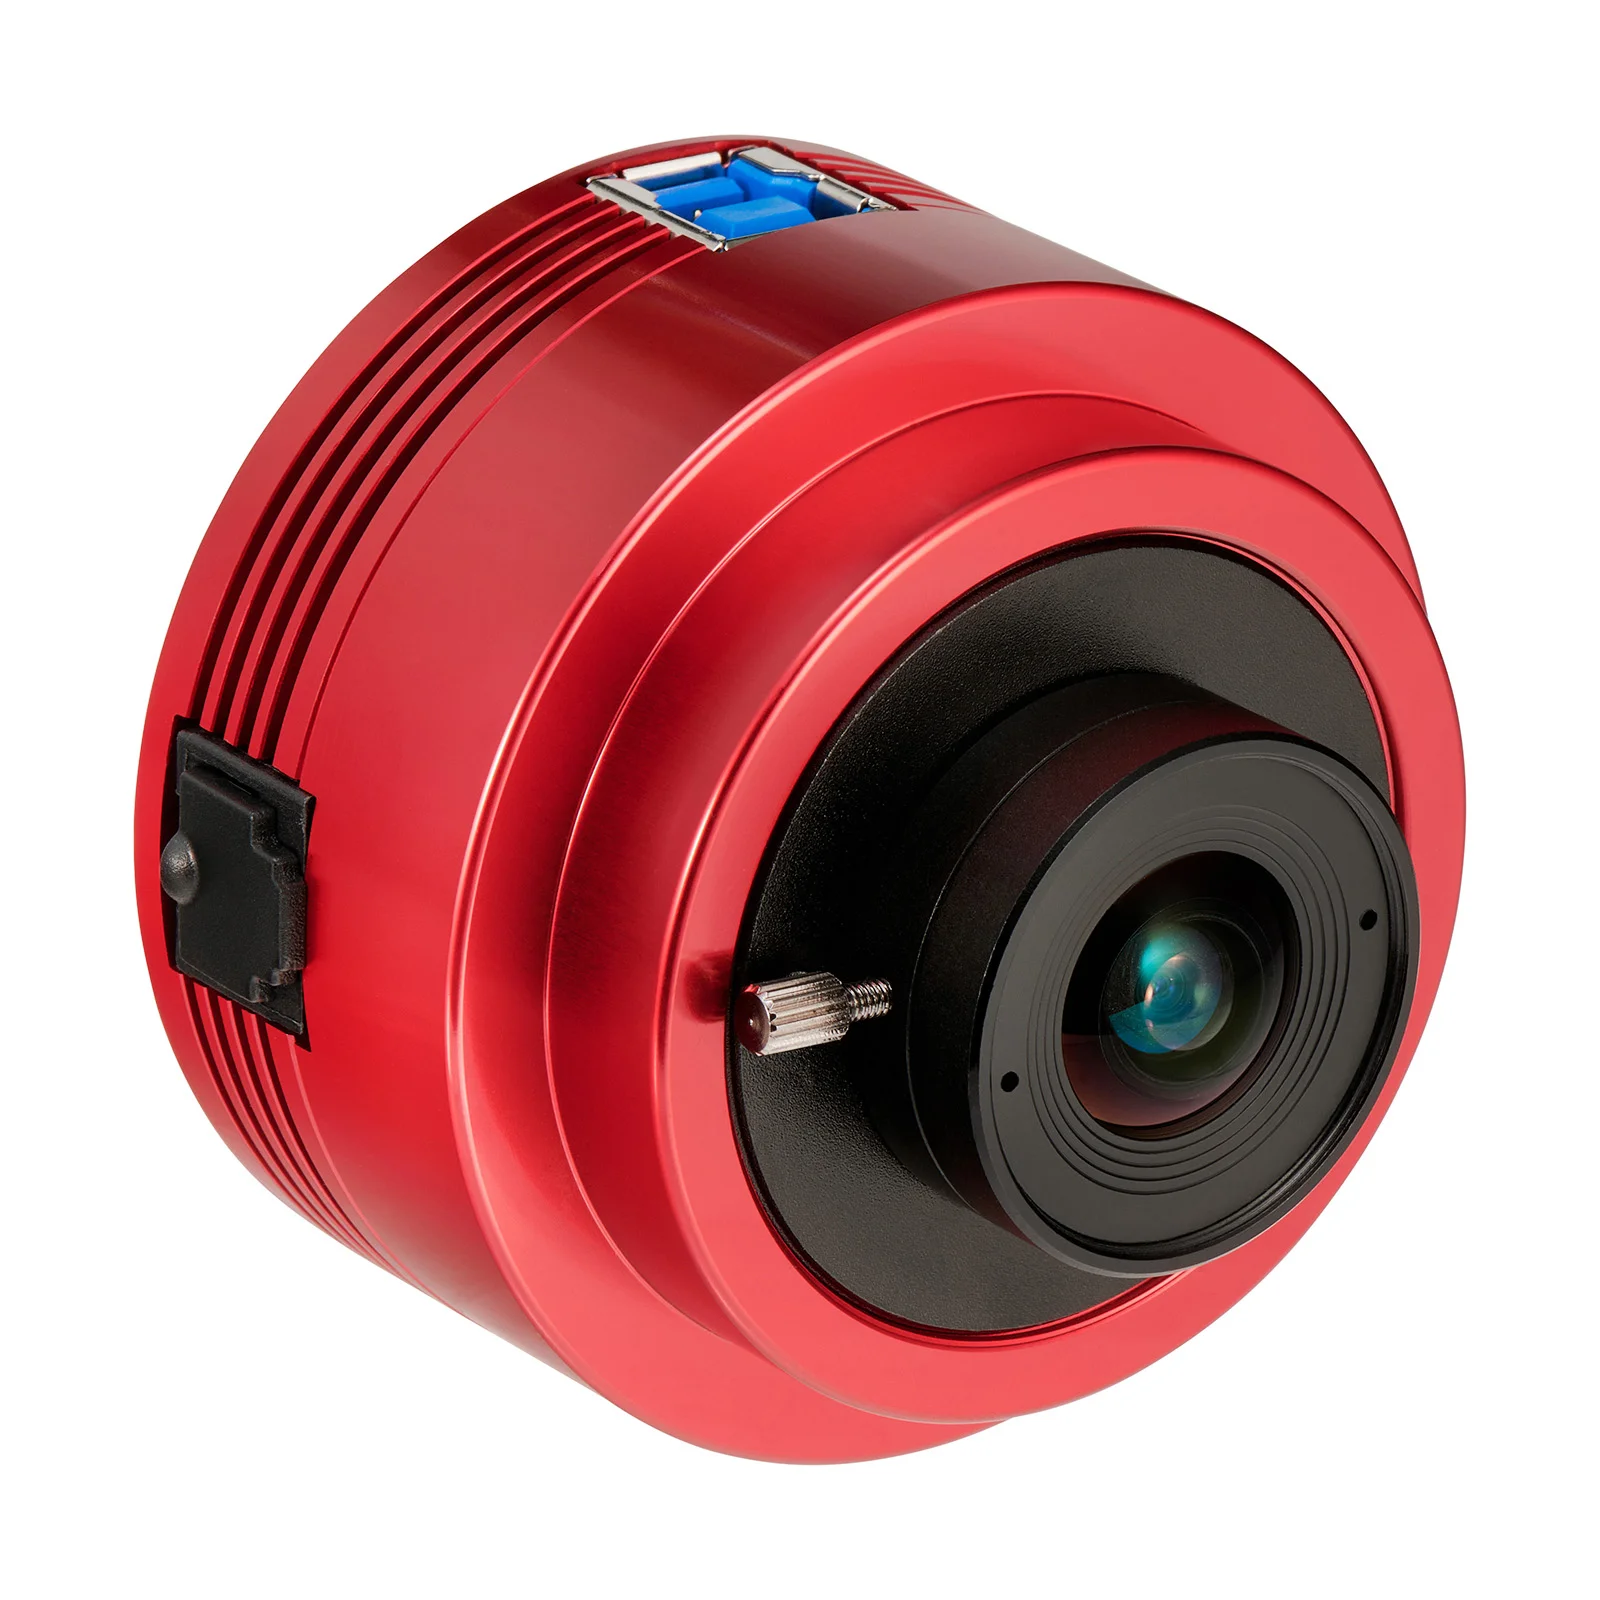
ZWO ASI678MC
Small 2-micron pixels give the full solar disc at 400mm with room to crop into detail, and USB3 runs the fast video capture that beats the seeing. The mono ASI678MM is sharper still if you can stretch to it.
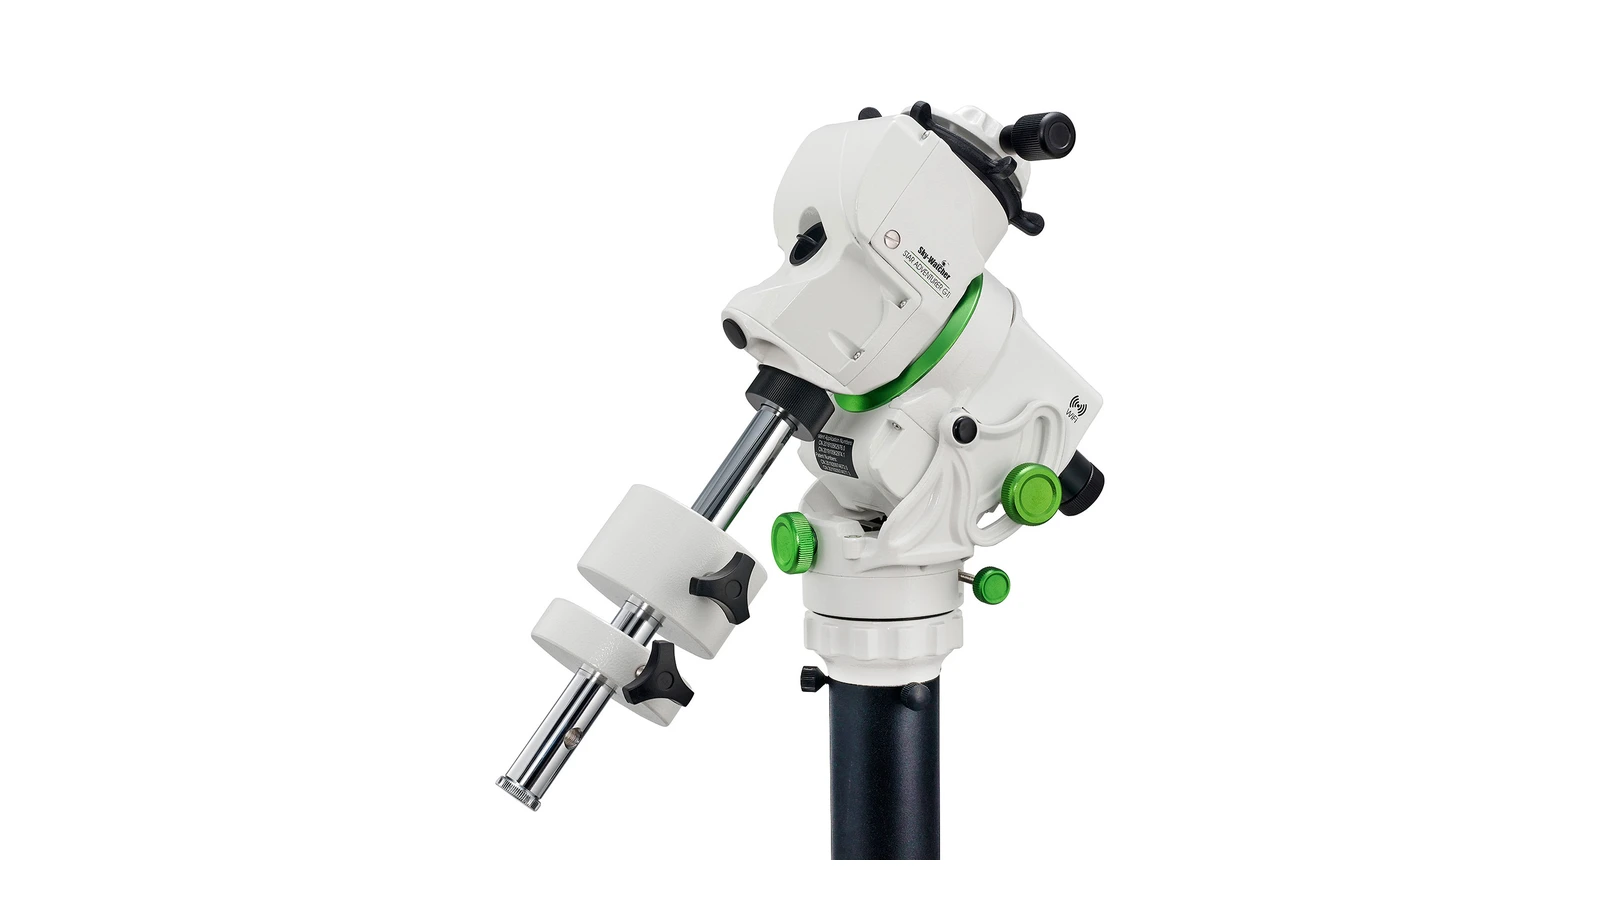
Sky-Watcher Star Adventurer GTi
Tracks the Sun so it stays put during a two-minute video run, and carries the whole rig on an ordinary photo tripod. The SynScan app has a solar alignment mode, so you never need to see a star.
Affiliate links: you pay the same price, we earn a small commission that helps keep WatchTheStars free.
Is a Hydrogen-Alpha Solar Telescope Safe?
A dedicated H-alpha telescope is safe to look through as supplied. The energy rejection filter on the front strips out the heat and ultraviolet before light enters the tube, and the blocking filter in the diagonal removes the rest. Between them they cut the Sun to a safe level the same way eclipse glasses do, just at one very specific colour.
How to Set Up and Tune an H-Alpha Solar Telescope
- Level the tripod and point the mount roughly north. For a GTi, use the app's solar alignment: enter your location, point it at the Sun, and it does the rest. A rough polar alignment using a compass and the latitude scale is plenty; you are tracking for two minutes at a time, not two hours.
- Find the Sun with the shadow. There is no finder. Move the scope until its shadow on the ground is a perfect circle with no elongation, and the Sun will be in or near the field of view. The Lunt has a tiny sun-finder built into the dovetail for the same job.
- Focus on the limb first with an eyepiece. Get the edge of the disc sharp, then swap to the camera. Camera focus will be close but not identical; refine it on the software preview using the spicules along the limb, which are the finest detail you have.
- Tune the etalon. Turn the tilt ring slowly while watching the disc. At one end the surface is featureless orange; as you approach the sweet spot, filaments darken and the texture appears. Go slightly past, come back. The best setting for surface detail and the best for prominences are usually a touch apart, so note both.
- Let it settle. Ten minutes in the sun warms the etalon and shifts the tuning slightly. Retune before each serious capture.
What Camera Settings Should I Use for Solar Imaging?
Record video, not stills. Daytime seeing is turbulent, and a single frame is almost always soft. A thousand frames contain a few hundred sharp ones, and the software finds them. SharpCap (Windows) and ZWO's own ASICap (Windows and Mac) are both free and both fine.
| Setting | Disc (surface detail) | Prominences |
|---|---|---|
| Format | SER video, RAW8 or RAW16 | Same |
| Gain | Low, about 100 to 150 | Same |
| Exposure | A few ms; histogram peak at 60 to 70% | 3 to 4 times longer; disc will burn out |
| Frames | 1,000 to 3,000 | 1,000 to 2,000 |
| Run length | Under 90 seconds | Under 90 seconds |
Keep each run short because the Sun rotates and prominences move; much over a couple of minutes and the stacking software starts fighting real change rather than seeing. On a colour camera, tick "debayer" off in capture and let the stacking software extract the red channel, or simply stack the debayered frames and convert to mono afterwards. Both work.
Two captures, one for the disc and one for the prominences, is the standard approach. The disc is far brighter than the prominences, so a single exposure that shows both well is not possible. You blend them in processing.
How to Process Hydrogen-Alpha Solar Images
Four steps, all with free software, all on a laptop that is a few years old.
- Stack in AutoStakkert! Load the SER file, set it to "surface" mode with alignment points across the disc, and keep the best 10 to 30 per cent of frames. On a good day keep more; on a wobbly one keep fewer. Output a 16-bit TIFF.
- Sharpen in ImPPG or Registax. Both use wavelets to bring out the fine texture. Go gently: the fibrous chromosphere over-sharpens into a crunchy mess quickly. ImPPG's unsharp mask plus a small Lucy-Richardson pass is the cleaner route for solar work.
- Blend disc and prominences. In GIMP or Photoshop, put the prominence stack under the disc stack and mask out the burnt-out disc from the longer exposure. A soft-edged mask a few pixels inside the limb hides the join.
- Add colour. The image is mono. Most people tint it orange with a curves adjustment (lift red, a little green, no blue) or a colour balance layer. Inverting the disc before colouring, so plage goes dark and filaments go bright, is a popular look because it makes structure jump out.
Why Do My H-Alpha Solar Images Look Wrong?
Four problems account for nearly every disappointing first session, and all four have simple fixes.
- Curved stripes across the disc (Newton's rings). Interference between the sensor's cover glass and the narrowband light. Fix it with a tilt adapter between camera and scope, a few degrees is enough, or by taking flat frames. Colour cameras suffer far less than mono.
- Dark doughnuts and smudges. Dust on the sensor window or blocking filter. Take flat frames: defocus the scope, or drape a white T-shirt over the front, record a short video at the same settings and let AutoStakkert! or SharpCap apply it as a flat. Flats also fix the next problem.
- One side of the disc brighter than the other. The etalon's sweet spot is off-centre, so tuning varies across the field. Retune with the disc centred, and use a flat frame to even out what remains. A double-stack (a second etalon on the front) narrows the band to about 0.5 ångströms and makes surface detail far more even, at roughly the cost of the scope again.
- Everything soft, limb boiling. Seeing, not your kit. Shoot earlier in the morning, over grass, and keep more frames from the stack on the good days and fewer on the bad ones. If focus is the suspect, refocus on the spicules at the limb with the software preview zoomed in.
If you see the same features that everyone else posted that day but yours are less crisp, that is normal for a 40mm scope in UK air. Detail improves more with practice at tuning and processing than with any purchase.
When Is the Best Time to Photograph the Sun in the UK?
Mid-morning. The Sun needs to be 30° or more above the horizon so you are not looking through a thick wedge of turbulent air, but the longer the ground has baked, the worse the seeing gets. From most of the UK, 09:00 to 11:30 in spring and summer is the sweet spot. Set up over grass, not patio or tarmac, and away from roofs that are shedding heat.
Winter is hard. From December to January the Sun never gets above about 15° from southern England, and less further north, and the detail suffers. It is still worth doing for prominences, which are less affected than the disc. The upside of solar imaging is that there is always a Sun: no waiting for new Moon, no driving to a dark site, and through the current solar maximum there has been an active region on show nearly every clear day.
One date to circle: the 2027 solar eclipse from the UK on 2 August, when an H-alpha scope will show the Moon's edge sliding across prominences. Practise this year. The astronomy events calendar has the rest of the solar dates.
Cheaper ways in
If £1763 is more than you want to spend on a first go, a second-hand Coronado PST with a used ASI120 or ASI224 camera on a manual mount gets you real H-alpha images for around £600. The scope is slower to tune and the images are smaller, but the prominences are the same prominences. And if you already own a smart telescope with its solar filter, you can shoot sunspots in white light today, which is a good way to find out whether you enjoy chasing the Sun before buying the narrowband kit.